Attaching Actors to each other in UE5 C++ | Equipping a Weapon in Adfectus
- 9 minsThis tutorial focuses on creating a weapon that a character can equip in UE5. This is a follow-up to the Collisions and Damage in UE5 Tutorial. In this tutorial, we will focus on how you can equip a weapon to a character.
We’ll start by implementing the essential bits in C++, then we move to Blueprints. The behavior in C++ can be defined in a few steps: (1) Create the weapon, (2) Attach the weapon to the character, and (3) Set the character as the wielder of the weapon. The behavior in the Blueprints will only facilitate the creation and equipping of a weapon.
The Weapon… Equippable
To equip a weapon, the bulk of the work is performed on the character.
For the weapon itself, we just need to keep the reference to its owner and disable collisions with it. Let’s look at how we can do it.
UCLASS()
class CPPTHIRDPERSON_API AWeapon : public AActor
{
    GENERATED_BODY()

    // Weak Pointer to the wielder.
    UPROPERTY()
    TWeakObjectPtr<class AActor> WielderPtr;

public:

    // Function to set the wielder.
    UFUNCTION(Category = Weapon)
    void SetWielder(class AActor* Actor);

    //...
}
In the header, we just need to add the reference and a new function. Recall that the weapon is an actor and can be placed in the scene separate from the character.
void AWeapon::SetWielder(AActor* Actor)
{
    if (AActor* Wielder = WielderPtr.Get())
    {
        WeaponMesh->MoveIgnoreActors.Remove(Wielder);
    }
    WielderPtr = Actor;
    if (Actor)
    {
        WeaponMesh->MoveIgnoreActors.Add(Actor);
    }
}
The character class will call the SetWielder function when equipping a weapon. What we want to do here is to define the new wielder and set it to ignore the collisions with that character (also note how we check the previous wielder and re-enable collisions with it). For the weapon that is it.
Let’s look at our character.
// Socket name where the weapon will be attached to.
#define RIGHT_WEAPON_SOCKET "Right_Weapon_Socket"

UCLASS(config = Game)
class AMyCharacter : public ACharacter, public IInteractor
{
    GENERATED_BODY()
    //...

public:
    // Called when this character is being destroyed.
    // If we have a weapon, we want to destroy it.
    BeginDestroy();

    UPROPERTY(Category = Weapon, VisibleAnywhere, BlueprintReadOnly, meta = (AllowPrivateAccess = "true"))
    class AWeapon* EquippedWeapon;

    /** Equips given weapon on the character. */
    UFUNCTION(BlueprintCallable, Category = Weapon)
    virtual void EquipWeapon(class AWeapon* Weapon);

    /** Drops Equipped Weapon if it exists. If destroy parameter is true, the weapon is destroyed instead of being dropped. */
    UFUNCTION(BlueprintCallable, Category = Weapon)
    virtual void DropWeapon(bool bDestroy = false);
}
In the header of our character, we need a pointer to our weapon and some new functions, to add and remove the weapon.
#include "Weapon.h"

void AMyCharacter::BeginDestroy()
{
    DropWeapon(true);
    //...
}

void AMyCharacter::EquipWeapon(AWeapon* Weapon)
{
    if (Weapon != nullptr)
    {
        /* Drop Equipped Weapon */
        DropWeapon();
        /* OR */
        /* Destroy Equipped Weapon. */
        DropWeapon(true);

        /* Use this weapon and attach it */
        EquippedWeapon = Weapon;
        /* OR */
        /* Create a copy of the weapon and attaching it. */
        FActorSpawnParameters parameters;
        parameters.Template = Weapon;
        EquippedWeapon = GetWorld()->SpawnActor<AWeapon>(Weapon->GetClass(), parameters);

        // Set the wielder, ignore collisions, and add it to the correct socket.
        EquippedWeapon->SetWielder(this);
        MoveIgnoreActorAdd(EquippedWeapon);
        EquippedWeapon->AttachToComponent(GetMesh(),
                                          FAttachmentTransformRules::SnapToTargetNotIncludingScale,
                                          TEXT(RIGHT_WEAPON_SOCKET));
    }
    else
    {
        UE_LOG(LogAdfectus, Warning, TEXT("Weapon is null."))
    }
}

void AMyCharacter::DropWeapon(bool bDestroy)
{
    if (EquippedWeapon != nullptr)
    {
        // Remove from the socket, making it seperate from the character.
        EquippedWeapon->DetachFromActor(FDetachmentTransformRules::KeepWorldTransform);
        // Re-enable collisions.
        MoveIgnoreActorRemove(EquippedWeapon);

        if (bDestroy)
        {
            EquippedWeapon->Destroy();
        }

        EquippedWeapon = nullptr;
    }
}
Here we need a bit more info. Let’s focus on the EquipWeapon() function. We start by dropping or destroying the former weapon if it exists (explained later). Now, we can either attach the selected weapon or make a copy of it using the selected weapon as a template and then calling SpawnActor(). Having our internal reference to the weapon, we can SetWielder() and, the most important part, we attach the weapon to our Skeletal Mesh, more specifically, to a select bone named “Right_Weapon_Socket”.
To drop the weapon, we will perform the logic in reverse, so we detach the weapon from the socket (using DetachFromActor() ) and if then you want to destroy the weapon, simply call Destroy() on it.
We just briefly discussed the MoveIgnoreActorAdd() and MoveIgnoreActorRemove() functions, but in essence these functions disable the collisions between weapons and wielder. Note how it is called both by the wielder towards the weapon, and the weapon towards the wielder.
Now we have all the C++ code we will need. So how do we use them?
Into the Blueprints
Let’s define our steps:
- Create a weapon Blueprint and place a weapon in the level;
- Have the character pick up the weapon;
- Have the character drop the weapon.
Although we could implement a part of this behavior in C++ because of its simple contents, let’s do it in Blueprints.
Create a Weapon Blueprint
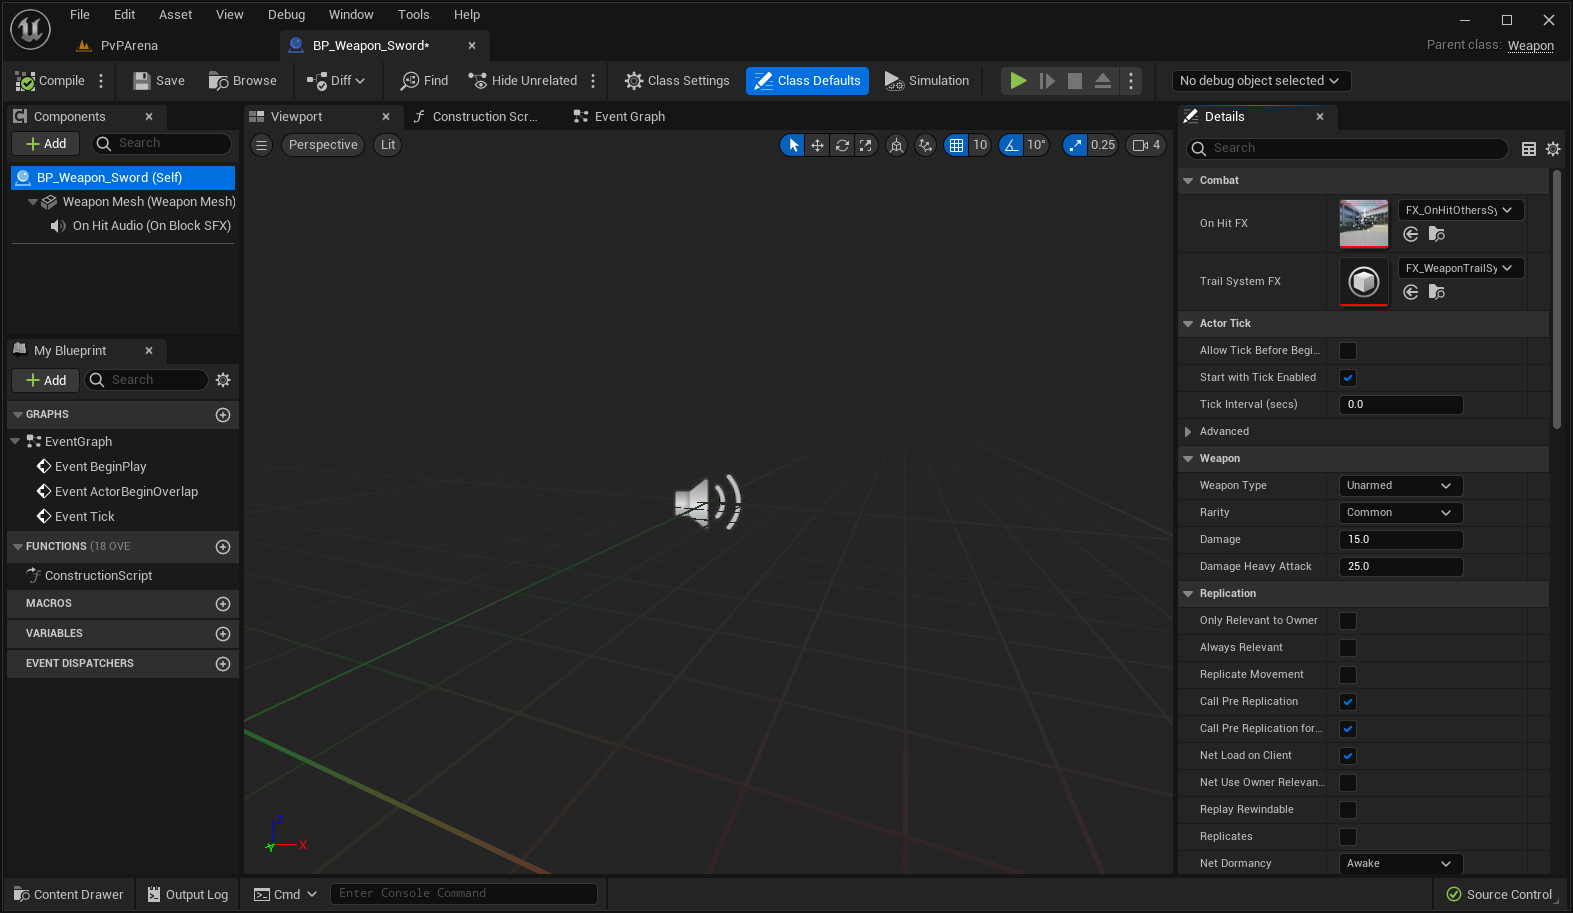
For this example, we’ll create a sword to equip. In the Content Drawer > C++ Classes go to your Weapon class, right-click, and create a Blueprint based on the weapon. We’ll name it BP_Weapon_Sword. A window will now open showing something like this:

In the image, you will see a bit more content that you will not see on your weapon (future content hint), don’t worry!
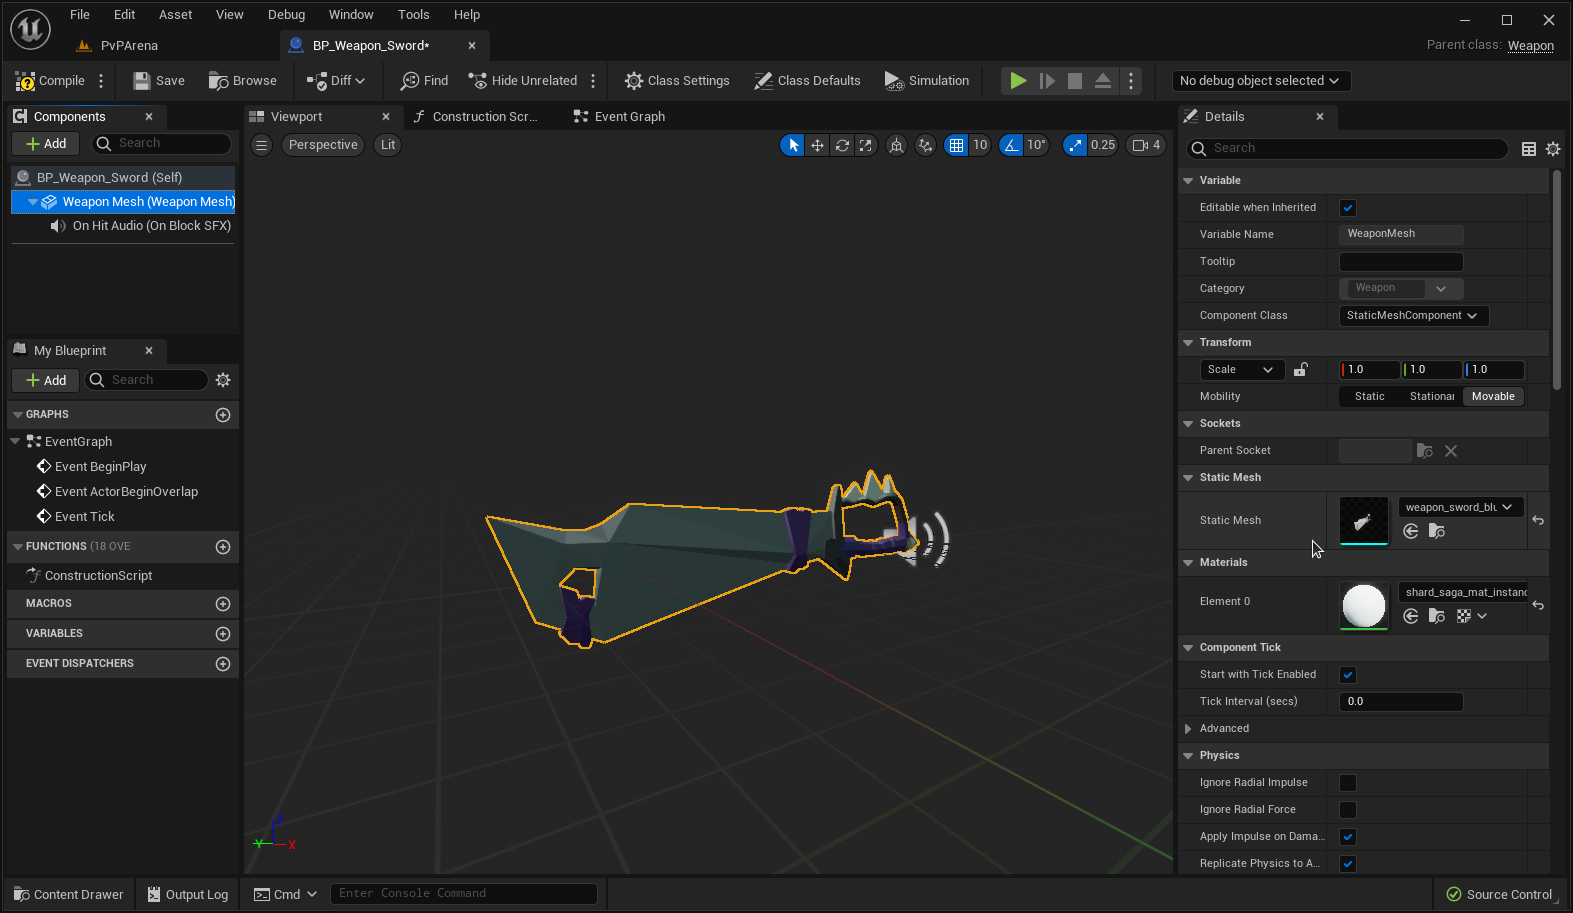
Now let’s populate our weapon. You can change the variables defined in your C++ class by selecting the root element in the Components panel ( BP_Weapon_Sword (Self) ) and taking a look at the Details panel. For this example, we will just modify our Weapon Mesh to a sword. In the Components panel, we’ll select the Weapon Mesh and, in the Details panel, define our Static Mesh. It will look something like this:

Save and this will be enough for our weapon. For now, we just need to place it on the level.
Have the Character pick up the Weapon
In our current stage, we will have a weapon in the level and a character that we can control. Regarding the character, I will assume we have a Blueprint instance of the C++ character where we did our changes. With this in mind, let’s open our character Blueprint. In the Event Graph, we will implement an event that when a key is pressed (we’ll use E), we select the nearest weapon and equip it. It should look something like this:
The implementation is quite straightforward. We scan for the nearest actor of the Weapon class (ignoring our equipped weapon if there is one), if we find one we cast it to Weapon, and then we call the EquipWeapon() function we defined in C++. We should now be able to pick up the weapon. Let’s see what it looks like:
Have the Character drop the Weapon
To drop the weapon, we’ll use an event that when a key is pressed (we’ll use R), we drop our weapon. It should look something like this:
Because most of our behavior is done in C++, we just need to call it. Let’s see what it looks like by picking up a weapon and dropping it:
Because the weapon does not have any physics, it does not fall and just stays put, but all the behavior is implemented as expected.
In Summary
So, to wrap up, we first added the C++ code to associate and attach a Weapon Actor to a Character, then we created a Blueprint of a weapon (in the shape of a sword), and finally, we implemented simple mechanics that equip the nearest weapon to the character.
As a personal note, this was quite a big undertaking for me, as I am new to this type of content, yet it is very rewarding to explain my work. Feel free to send suggestions and questions below!
