Collisions and Damage in UE5 | Combat in Adfectus
- 11 minsI hope this to be the first of many dev logs on how I implemented mechanics in my game, Adfectus. These will be technical and mix C++ and BP code. Feel free to comment below with any questions or suggestions.
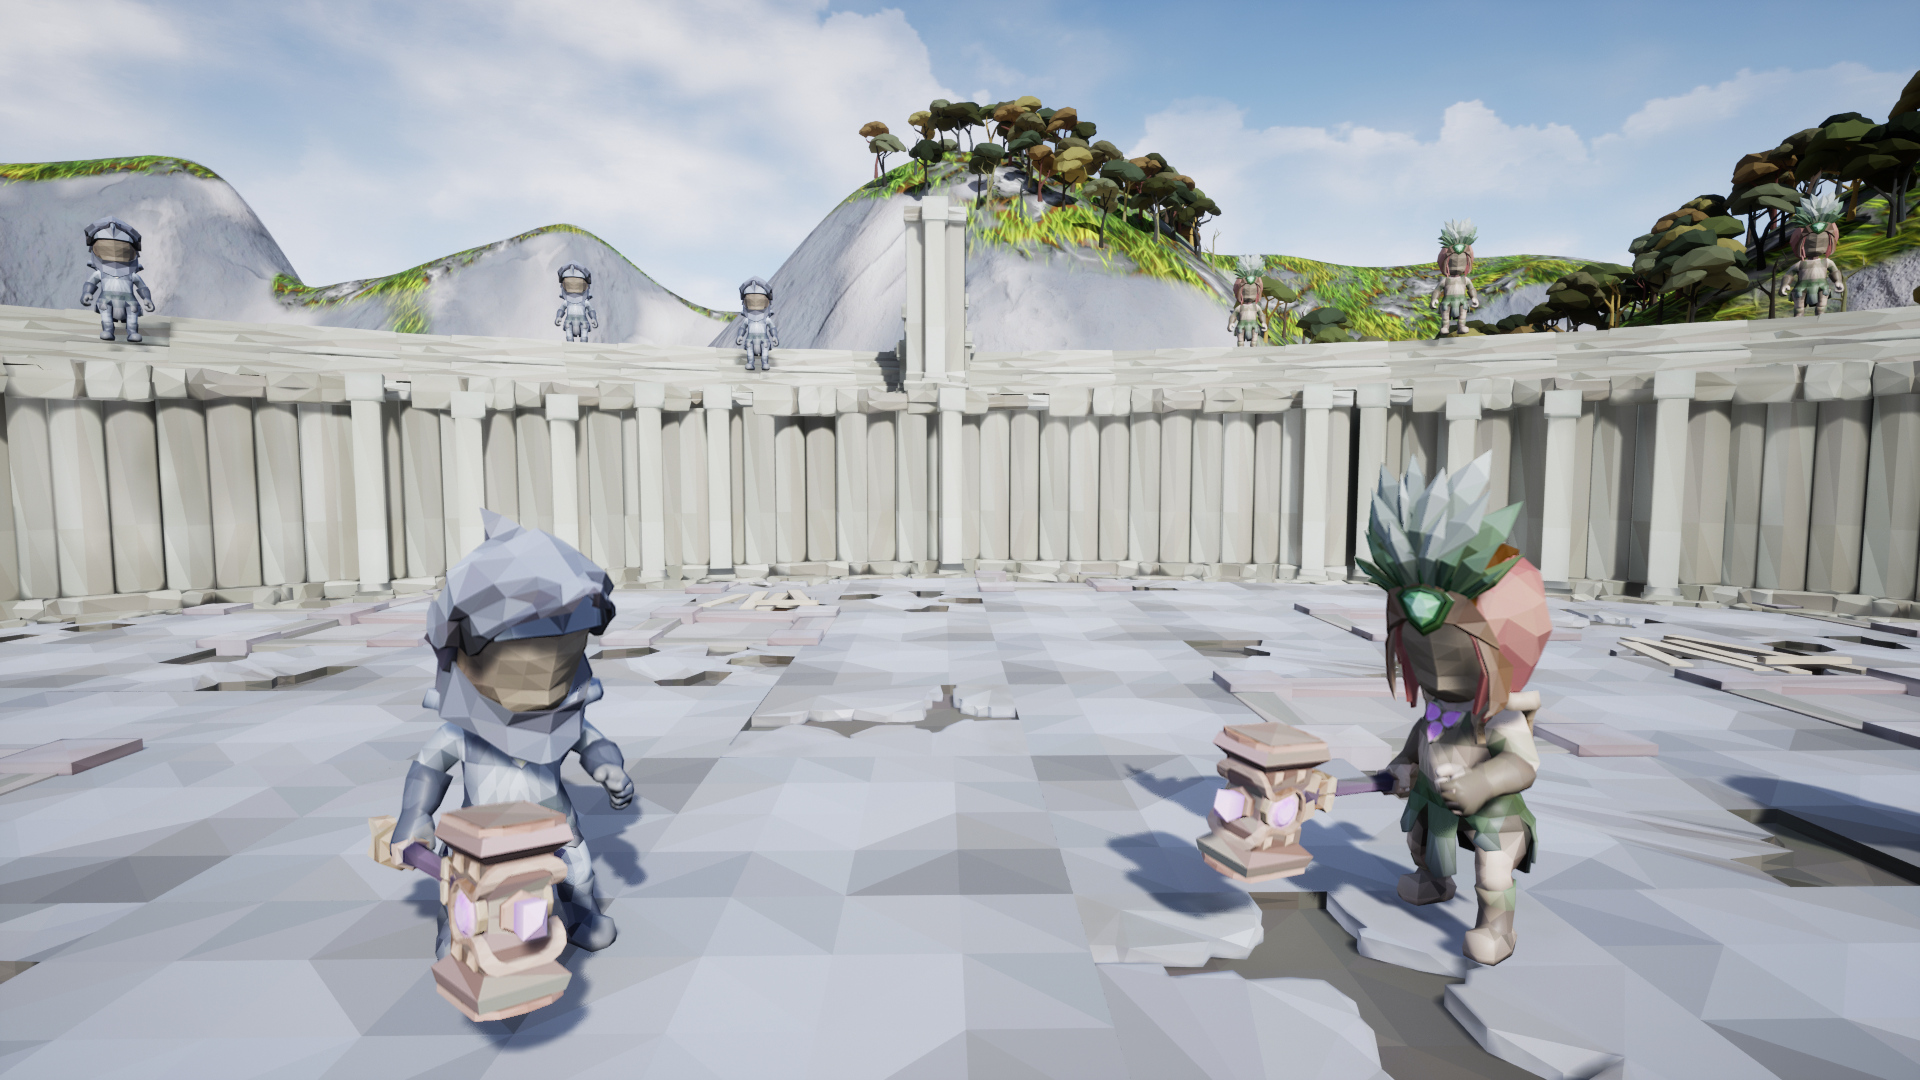
In this post, I hope to showcase how I implemented the combat main mechanics, that of (a) having a weapon actor, (b) the weapon dealing damage, and (c) having others receive said damage. In summary, I use a static mesh in the weapon to detect collisions, I detect overlapping between it and other objects, and then I make it deal damage to that object.
The Weapon Class
The class is quite simple, but let’s first look at the code, and then I’ll get into more details when needed. I omitted code to focus on the important bits. In this tutorial, I will skip the code that deals with yielding the weapon (aka equipping it on another actor).
#pragma once

#include "CoreMinimal.h"
#include "GameFramework/Actor.h"
#include "Weapon.generated.h"

// We define a weapon as an Actor class
// so that we can place and move it in the world
UCLASS()
class CPPTHIRDPERSON_API AWeapon : public AActor
{
	GENERATED_BODY()

private:
    // Determines when should the weapon deal damage
	bool DealsDamage;

protected:
	// Called when the game starts or when spawned
    // It is where we will bind the collisions to their functions.
	virtual void BeginPlay() override;

public:
	// Sets default values for this actor's properties
    // It is were we initialize the mesh component.
	AWeapon();

	/** Mesh used to store the mesh that represents the weapon */
	UPROPERTY(Category = Weapon, VisibleAnywhere, BlueprintReadOnly, meta = (AllowPrivateAccess = "true"))
	class UStaticMeshComponent* WeaponMesh;

    // Function that detects a block collision with an object
	UFUNCTION(Category = Character)
	void OnHit(AActor *SelfActor, AActor *OtherActor, FVector NormalImpulse, const FHitResult &Hit);

    // Function that detects an overlap with an object
	UFUNCTION(Category = Character)
	void OnBeginOverlap(UPrimitiveComponent* OverlappedComponent, AActor* OtherActor, UPrimitiveComponent* OtherComp,
	                    int32 OtherBodyIndex, bool bFromSweep, const FHitResult& SweepResult);

    // Amount of damage to deal when something is hit.
	UPROPERTY(Category = Weapon, EditAnywhere, BlueprintReadWrite, meta = (ClampMin = "0", UIMin = "0"))
	float Damage = 10;

    // Function called to set if the weapon is dealing damage or not.
	UFUNCTION(Category = Weapon)
	void SetDealsDamage(bool dealsDamage);
};
Ok, it seems like a lot, but let’s see what we want it to do. First, we want to create it, this will be done by a character or spawning it in the world, where it will be initialized by calling AWeapon() and later BeginPlay(), in the latter, we bind the collision detection to the two functions OnHit() and OnBeginOverlap(). Next, during gameplay, when your character (who is yielding the weapon) performs an attack, we set the weapon to deal damage (calling SetDealsDamage(true)) and we wait for a collision. When a collision happens, one of the functions we defined is called. OnHit() is called if the collision was a block. OnBeginOverlap() is called if the collision was an overlap. See more details on UE5 Wiki.
With this in mind, let’s look at the source file. Let’s break it into several smaller bits of code to make it easier to understand.
#include "Weapon.h"
#include "Components/StaticMeshComponent.h"

// Sets default values
AWeapon::AWeapon()
{
    //... some code ...

    // Create the component and add it to the weapon actor.
	WeaponMesh = CreateDefaultSubobject<UStaticMeshComponent>(TEXT("Weapon Mesh"));
    // Set it's collision profile. More on this later.
	WeaponMesh->SetCollisionProfileName(FName("Weapon"));
    // Enable collisions
	WeaponMesh->SetNotifyRigidBodyCollision(true);
	SetActorEnableCollision(true);
    // Set as root component
	RootComponent = WeaponMesh;

    // Does not deal damage by default.
	DealsDamage = false;
}

// Called when the game starts or when spawned
void AWeapon::BeginPlay()
{
	Super::BeginPlay();

    // Bind each function to its corresponding call.

	FScriptDelegate onHitDelegate;
	onHitDelegate.BindUFunction(this, "OnHit");
	OnActorHit.Add(onHitDelegate);

	FScriptDelegate onBODelegate;
	onBODelegate.BindUFunction(this, "OnBeginOverlap");
	OnActorBeginOverlap.Add(onBODelegate);
}
This first part is simple-ish, first include our header and the StaticMeshComponent. Then we initialize the static mesh and on begin play we bind the functions. Now let’s look at the collision.
void AWeapon::SetDealsDamage(const bool dealsDamage)
{
    // In this example we can keep it simple.
	DealsDamage = dealsDamage;
}

void AWeapon::OnHit(AActor* SelfActor, AActor* OtherActor, FVector NormalImpulse, const FHitResult& Hit)
{
    // The code will be similar to the one below.
}

void AWeapon::OnBeginOverlap(UPrimitiveComponent* OverlappedComponent, AActor* OtherActor,
                             UPrimitiveComponent* OtherComp, int32 OtherBodyIndex, bool bFromSweep,
                             const FHitResult& SweepResult)
{
	// If we are not dealing damage, we can ignore the collision.
	if (!DealsDamage)
	{
		return;
	}

    // We will use the Damage System to deal damage to anyone else.
    // We create a generic damage event.
    FDamageEvent damageEvent;
    // We give the default damage type.
    damageEvent.DamageTypeClass = UDamageType::StaticClass();
    // And we notify the other actor that it has been damaged.
    OtherActor->TakeDamage(this->Damage, damageEvent, nullptr, Wielder);
}
Now we get to the interesting part. We define a simple function that lets us change when the weapon deals damage, and then, when colliding with another actor, we deal damage to it. The interesting part here is that we are using the UE4 Damage System (I advise you to look into that page to have a better understanding of what the system does), in essence, it is an abstraction of giving/receiving damage. An object that deals damage does not need to care about how the damage is dealt with and the object receiving it only needs to care about handling the damage.
Collision Profiles
Before moving on, let’s just take a quick look at how I dealt with collisions between weapons and other objects in UE5 (to learn more and in greater detail visit the UE5 Wiki on Collision and their Channels). We want the weapon to hit PhysicsBodies (e.g. a ball you can move around), overlap with Pawn (e.g. Player Characters and NPCs), and be ignored by the camera. To implement this behavior we need to (1) create an object channel called Weapon, and (2) design a collision preset to ease its use.
To create an Object Channel, visit Project Settings > Collision > Object Channels, here we can create a new channel and let its default response be Block. It should look something like this:

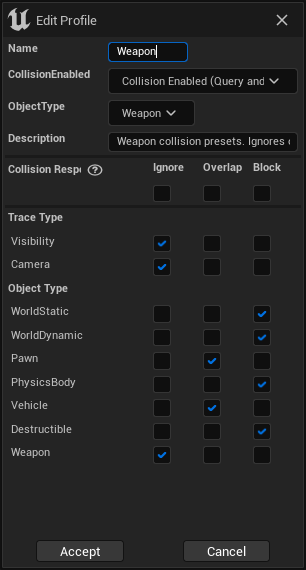
Now let us create our collision preset. In Project Settings > Collision > Preset, click New... and copy the following settings:

Note how it ignores other weapons and overlaps only the Pawn. Looking back, we have already assigned the preset to the weapon when we call WeaponMesh->SetCollisionProfileName(FName("Weapon"));. When colliding with a PhysicsBody the function OnHit() will be called, while when overlapping with Pawn the function OnBeginOverlap() is called.
For the weapon, this is most of what you need. You can already create a weapon and have the weapon deal damage.
Taking Damage
Now, to the objects we want to take damage (e.g. the main character, destructible environment, etc.), we need to override the function TakeDamage() and deal with the received damage. Here follows a snippet of how I implement this in my main characters.
// HEADER file

class ALeMainCharacter : public ACharacter, public IInteractor
{
	GENERATED_BODY()

//... more code ...

public:
	UPROPERTY(Category = "Character/Health", EditAnywhere, BlueprintReadWrite,
		meta = (ClampMin = "0", UIMin = "0"))
	float Health;

	virtual float TakeDamage(float DamageAmount, const struct FDamageEvent& DamageEvent,
	                         class AController* EventInstigator, class AActor* DamageCauser) override;
//... more code ...
}
For the header, we simply override the TakeDamage() function and, in this case, I implemented a Health variable.
// SOURCE file

float ALeMainCharacter::TakeDamage(float DamageAmount, const struct FDamageEvent& DamageEvent,
                                           AController* EventInstigator, AActor* DamageCauser)
{
	float damage = Super::TakeDamage(DamageAmount, DamageEvent, EventInstigator, DamageCauser);

    // If you want to deal with specific damage events, you can do it like this.
	if (DamageEvent.IsOfType(FPointDamageEvent::ClassID))
	{
		FPointDamageEvent* const PointDamageEvent = (FPointDamageEvent*) &DamageEvent;
		// In this example, the PointDamageEvent models damage applied at a specific point on the victim.
        FVector DamageLocation = PointDamageEvent->HitInfo.Location;
        // ... more code ...
	}

	Health -= damage;

	if (Health <= 0)
	{
        // I implemented a function to deal with death of the character.
		Die();
	}

	return damage;
}
In the function, we reduce the health by the amount of damage taken, and if the Health is 0 the character dies. Note that if you want to deal with specific damage events, we can deal with them here (e.g. a wooden crate takes fire damage and becomes ablaze).
Conclusion
With this tutorial, we learned how to implement a simple combat mechanic based on two engine mechanisms: the Collision Detection and the Damage System. In summary, we create a weapon that holds a static mesh, when a collision between the mesh and other objects is detected, the weapon deals damage to the other object. Finally, implement the behavior to deal with the damage received on relevant objects and the loop is complete! I leave you with a small video comparing the two types of collisions and showing the weapon dealing damage.
I hope this tutorial helps you and feel free to leave a comment with questions and suggestions.
